Couriers integration
1. Intro
The integration of a courier in EBS-RO encompasses several configurations, both on code and data.
If the code is already created, a set of files dealing with the courier’s API calls are already present in the software package. There is a standard set of automations for each of these integrations:
Create shipment,
and:Print shipment,
Update shipment,
Cancel shipment,
View shipment information.
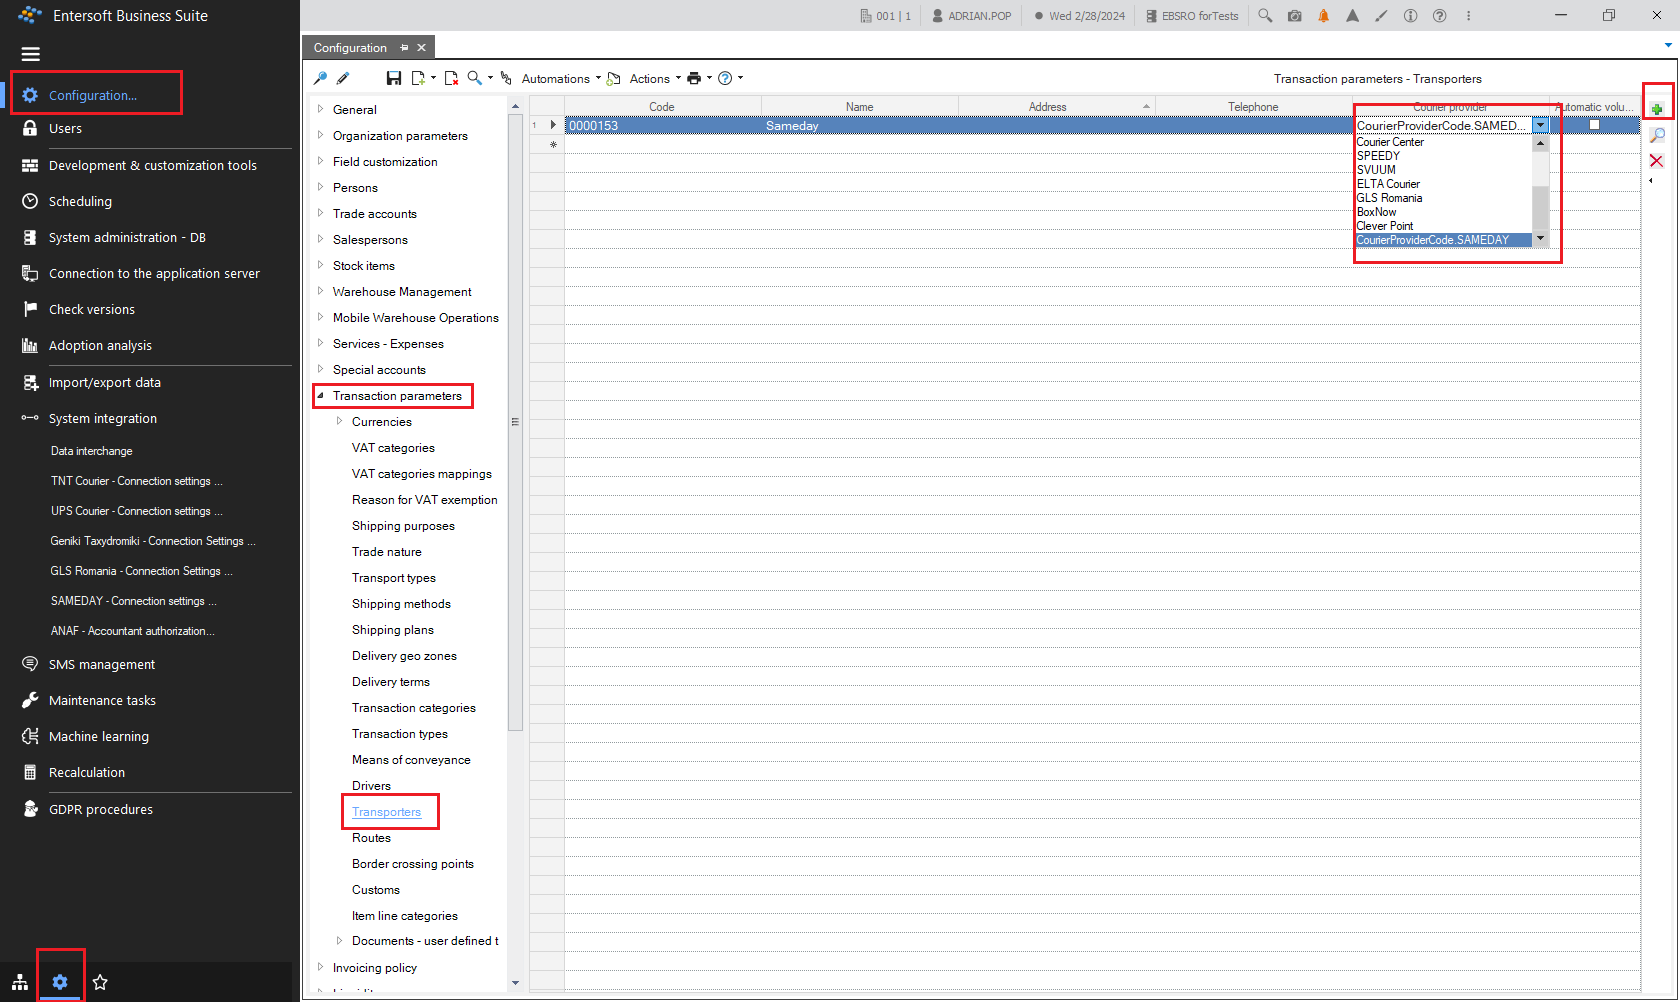
These automations are present in the menus of documents or scrollers that deal with shipments via couriers. These couriers are called Transporters, and a list of all the couriers that are integrated in any country specific EBS package is available if you open the menu Configuration and Tools > Configuration… > Transaction parameters > Transporters to add (+) a courier with which you want to work with.
2. Configure the courier
In the transporters list available in menu Configuration and Tools > Configuration > Transaction parameters > Transporters, you should add (+) the new courier, if it is not present in the scroller, by selecting it from a list of available couriers. On the line entry you can add some specific info such as Name, Address, Telephone and then Save it.
A complete data card for the transporter can be found in the Main Menu > Sales > Trade Accounts > Transporters.
Here you can edit all the information regarding the courier specific trade account partner, by double-clicking the transporter’s line to open its card form.
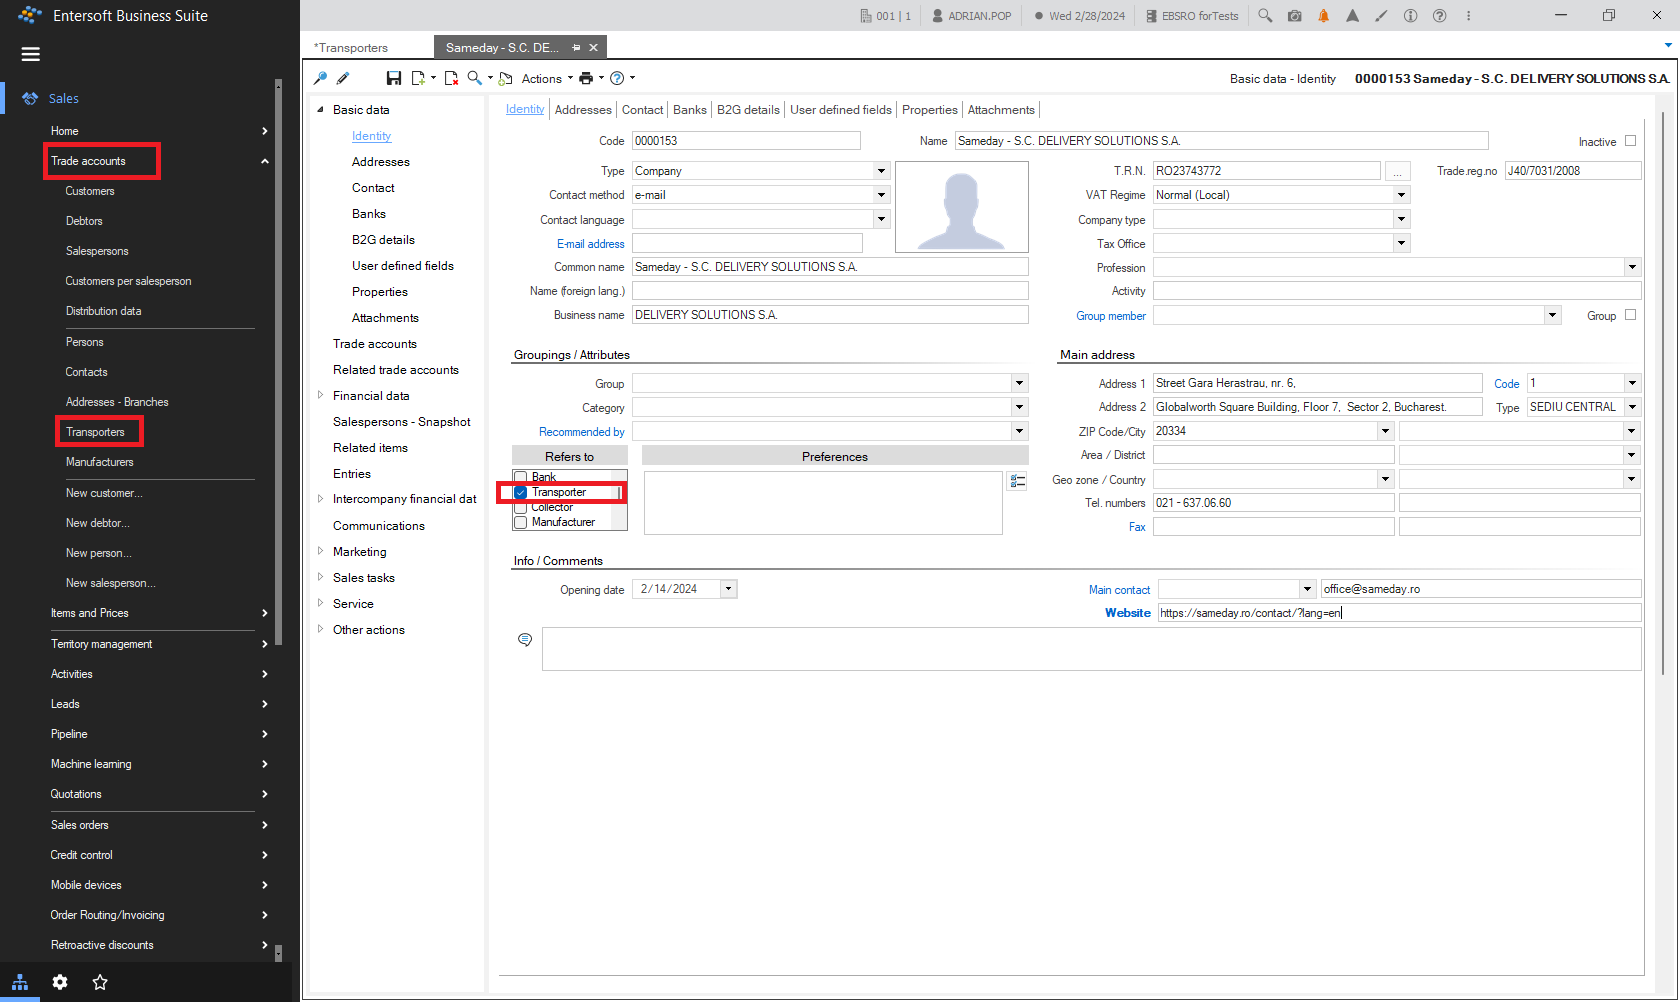
After filling all the necessary info for it, all that remains to configure is the actual account on behalf of which the courier will operate the shipments.
From the contract that you have to have with the courier you will have the account(s)’ credentials that you have to fill in the Connection setting menu here Configuration and Tools menu > System Integrations for Connection settings.
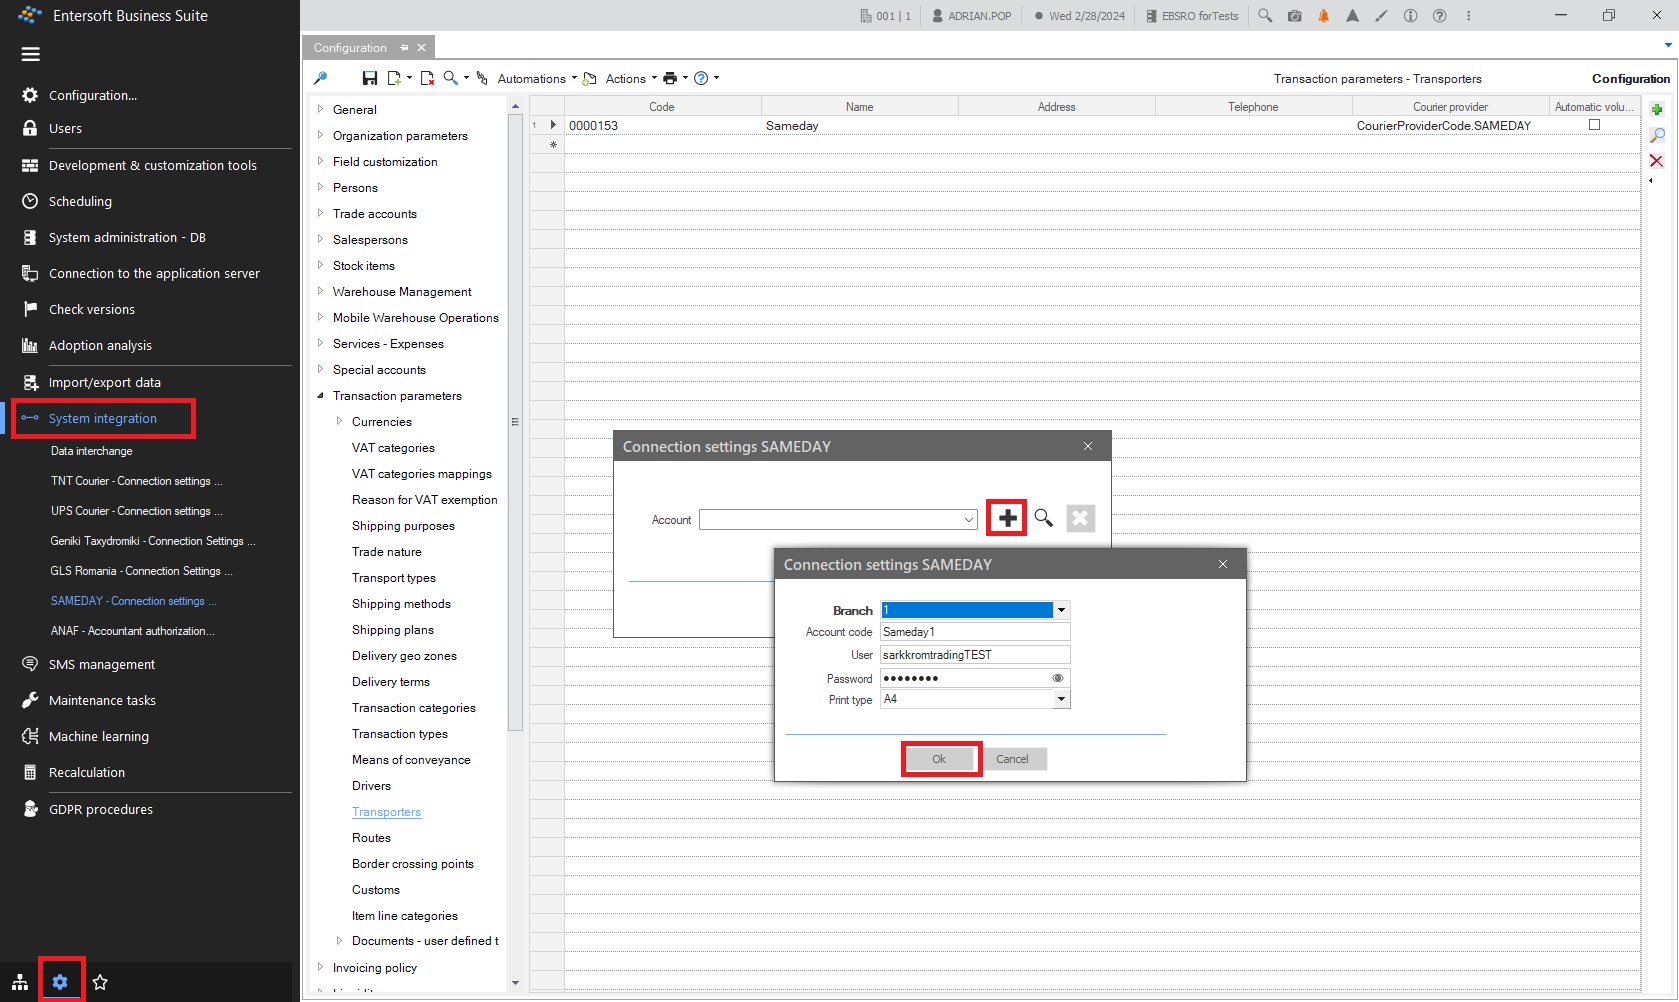
If there are multiple accounts contracted with the courier, each of them should be added here.
3. Shipments via courier
3.1 Create shipment
In order to create a shipment, first create a new Invoice or a Shipment Note document. Then on its second tab - Miscellaneous, select the courier in the Transporter field. After saving the document, in the Automations menu list you will see the Create shipment automation.
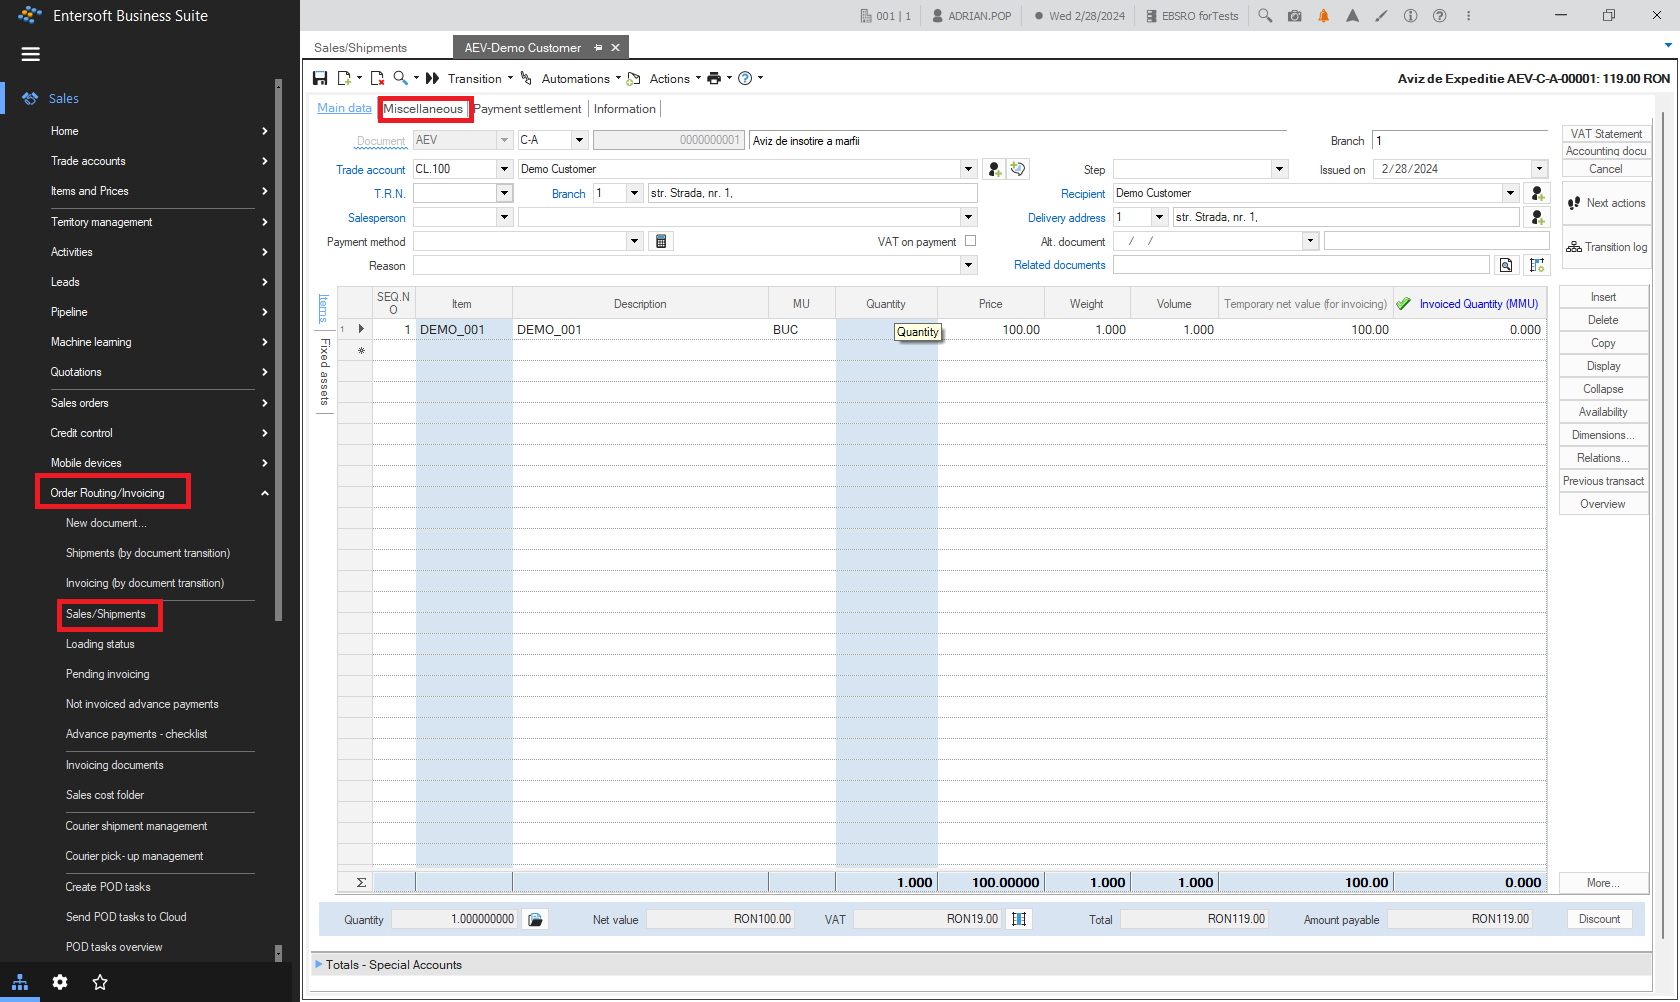
Note: For a document to have the Create shipment automation it must have had set the attribute SHIPMENT TRACKING.
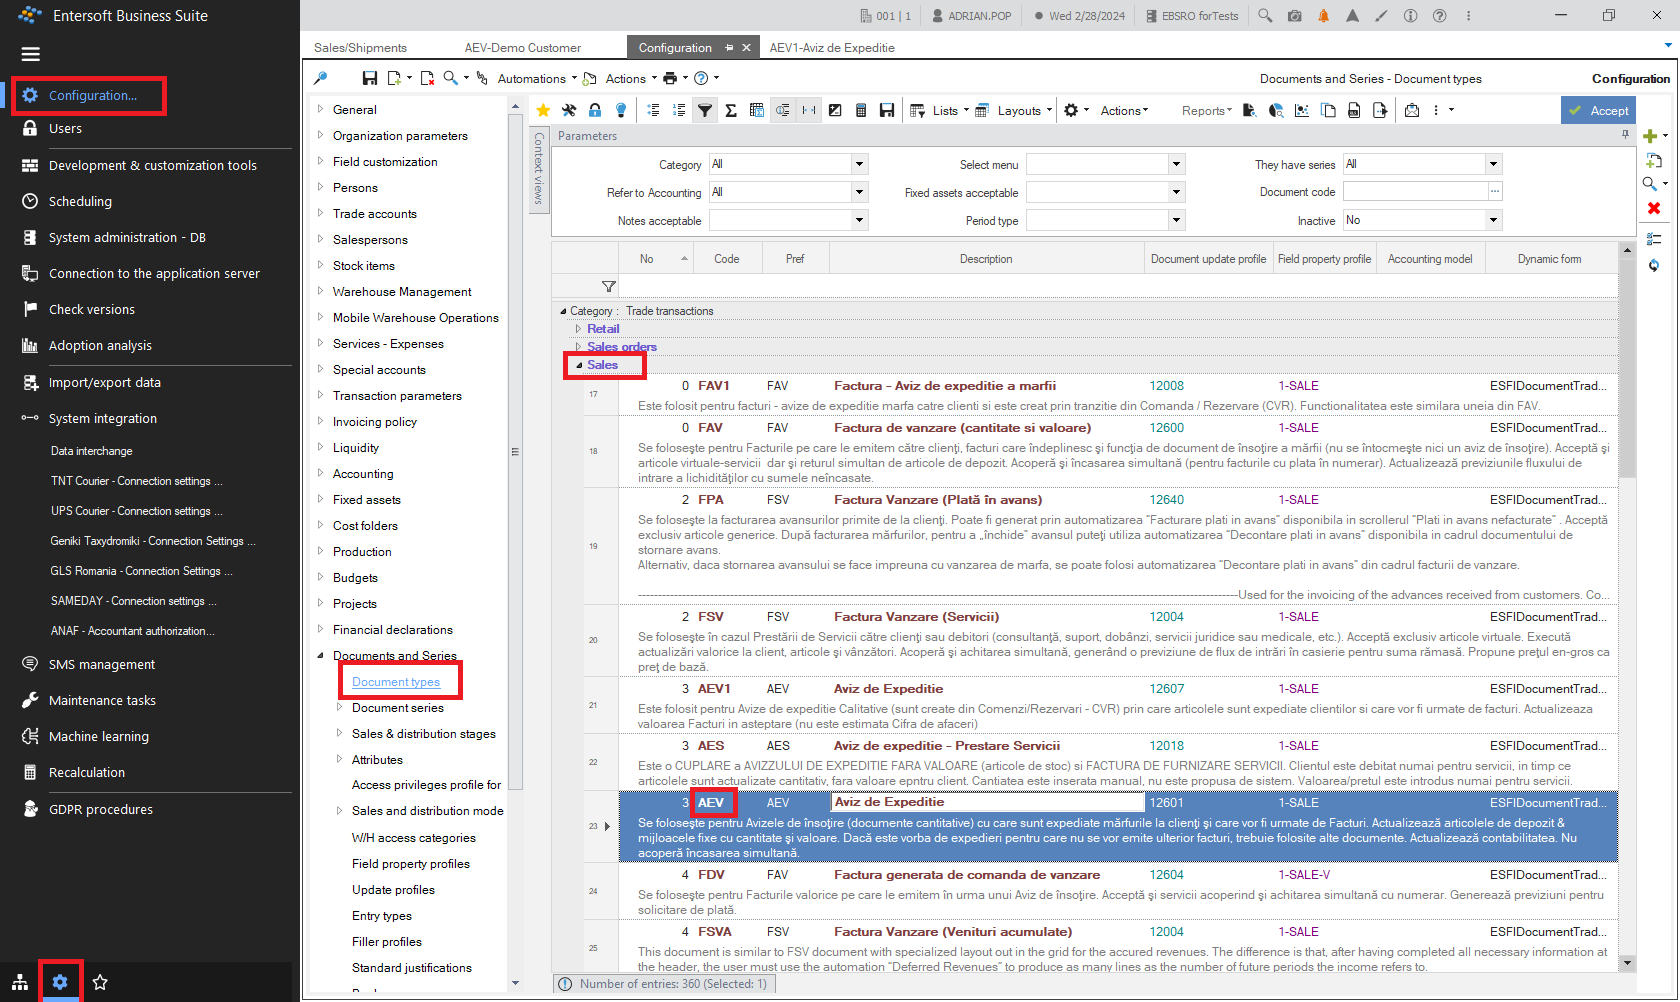
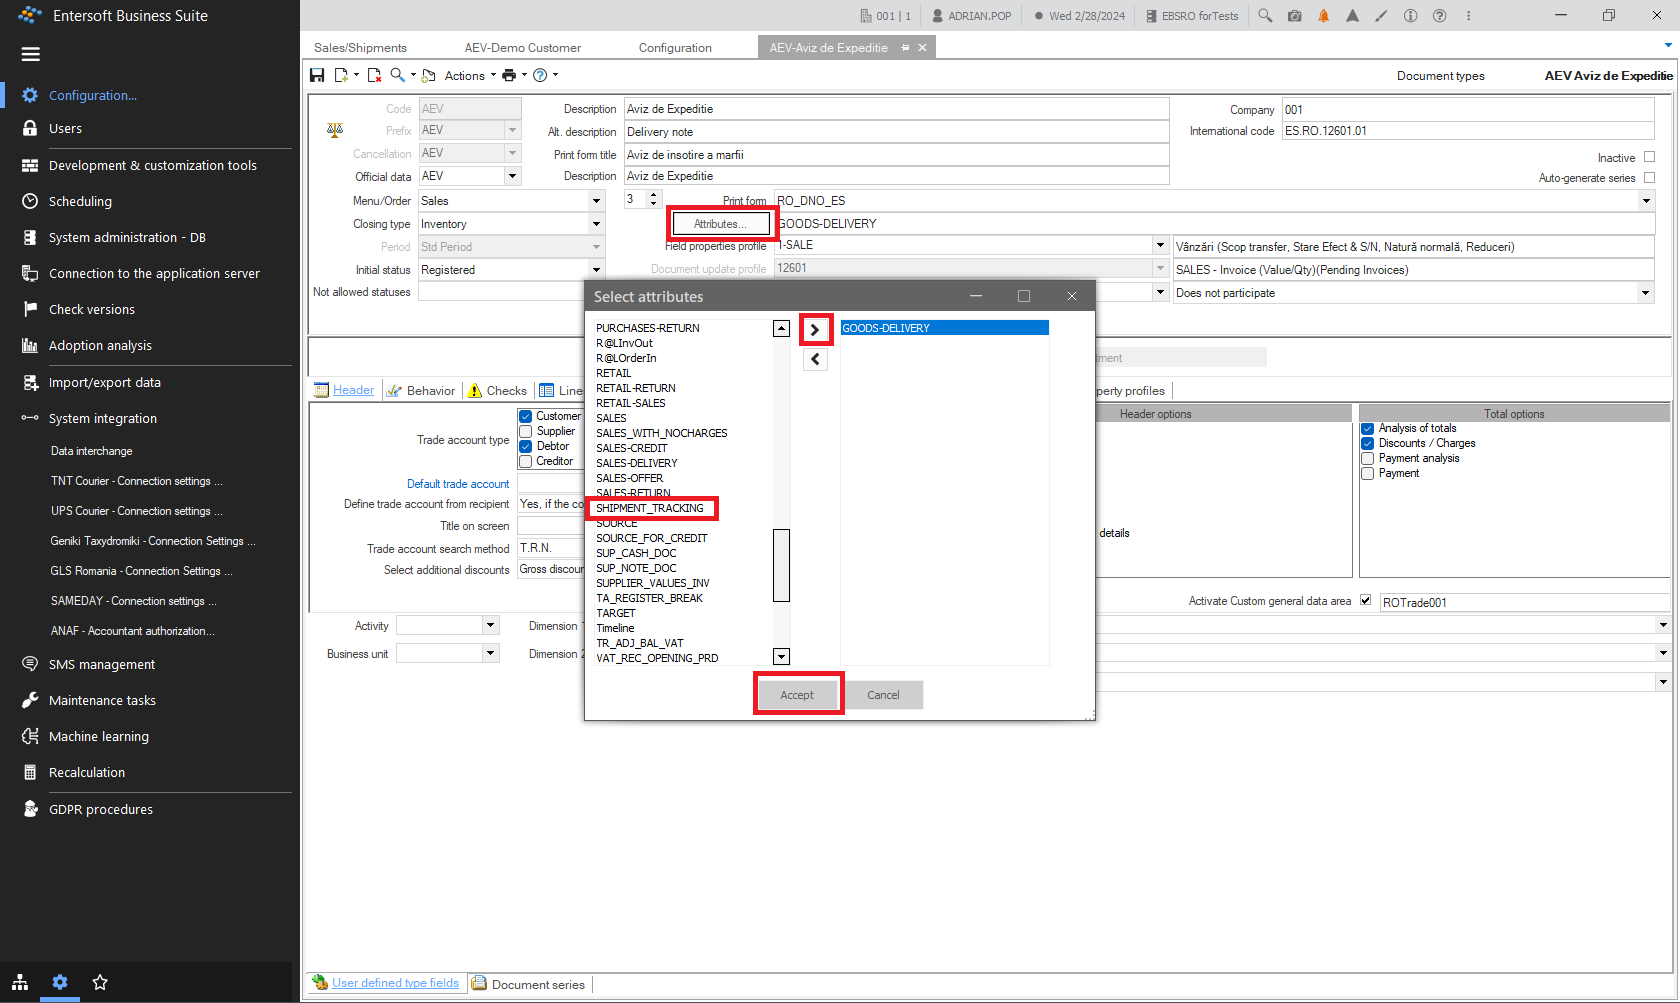
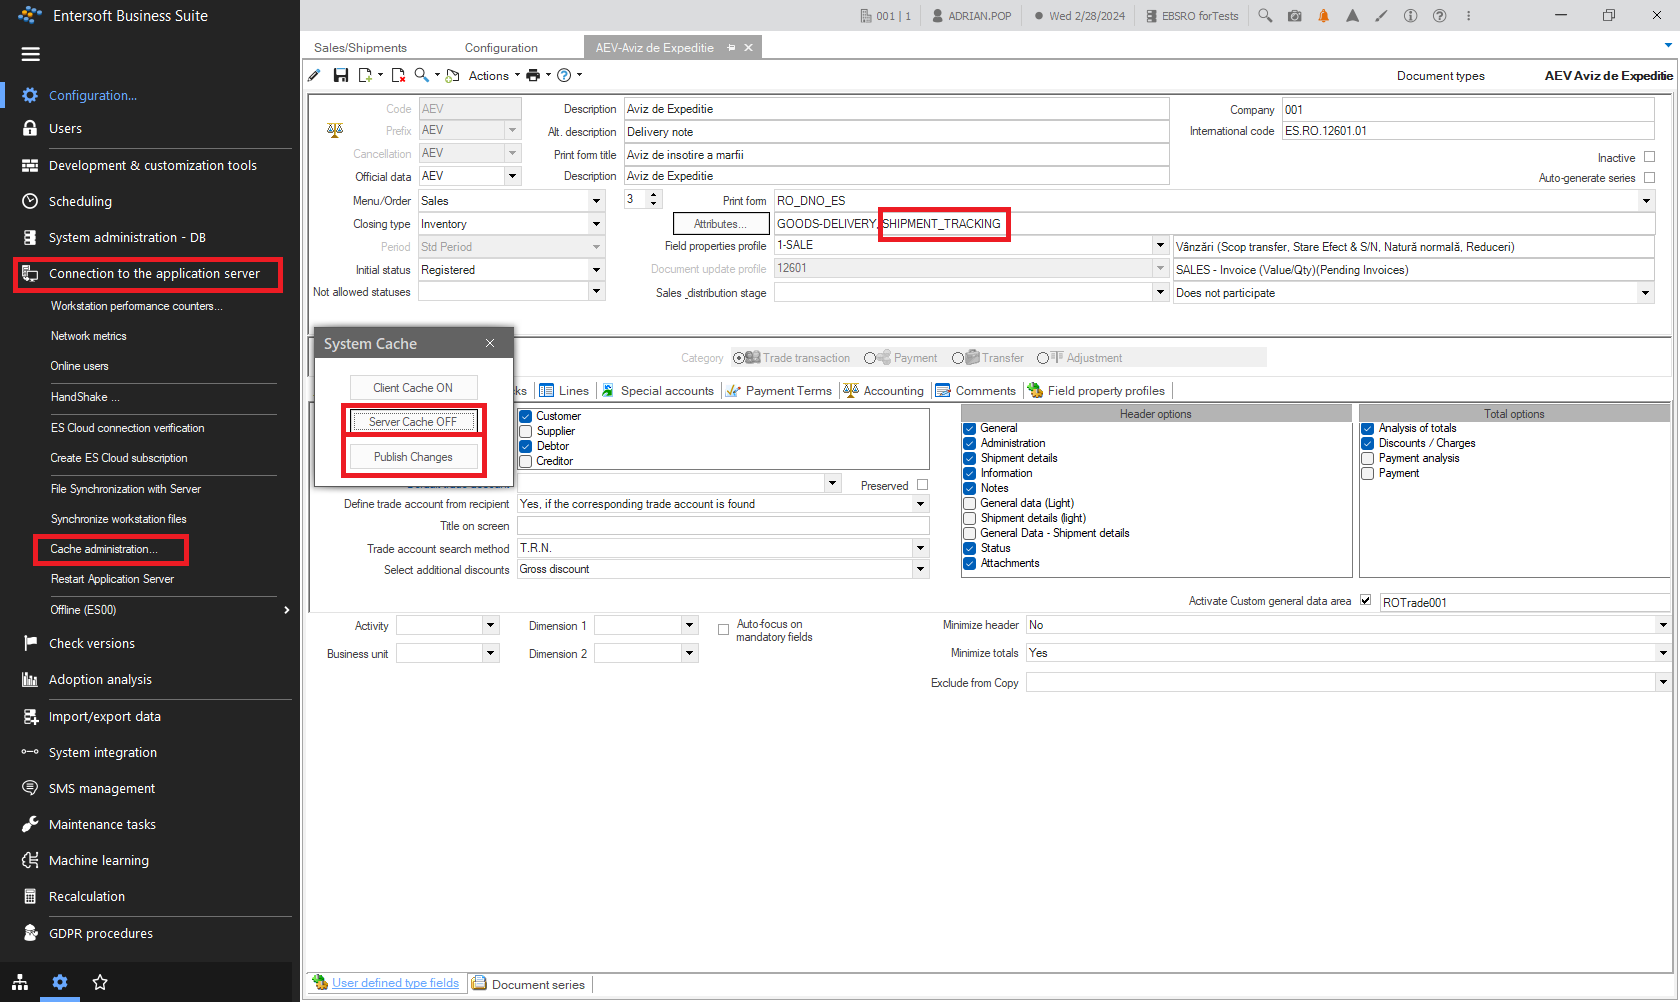
After such a parameterization the cache has to be cleared in order for this to be taken into account. Go to the menu Configuration and tools > Connection to the application server and select Cache administration. In the popup press the button Server cash OFF/ON to clear it and then Publish changes.
Now, going back to our shipping document we can select Create shipment from the Automation menu of our document.
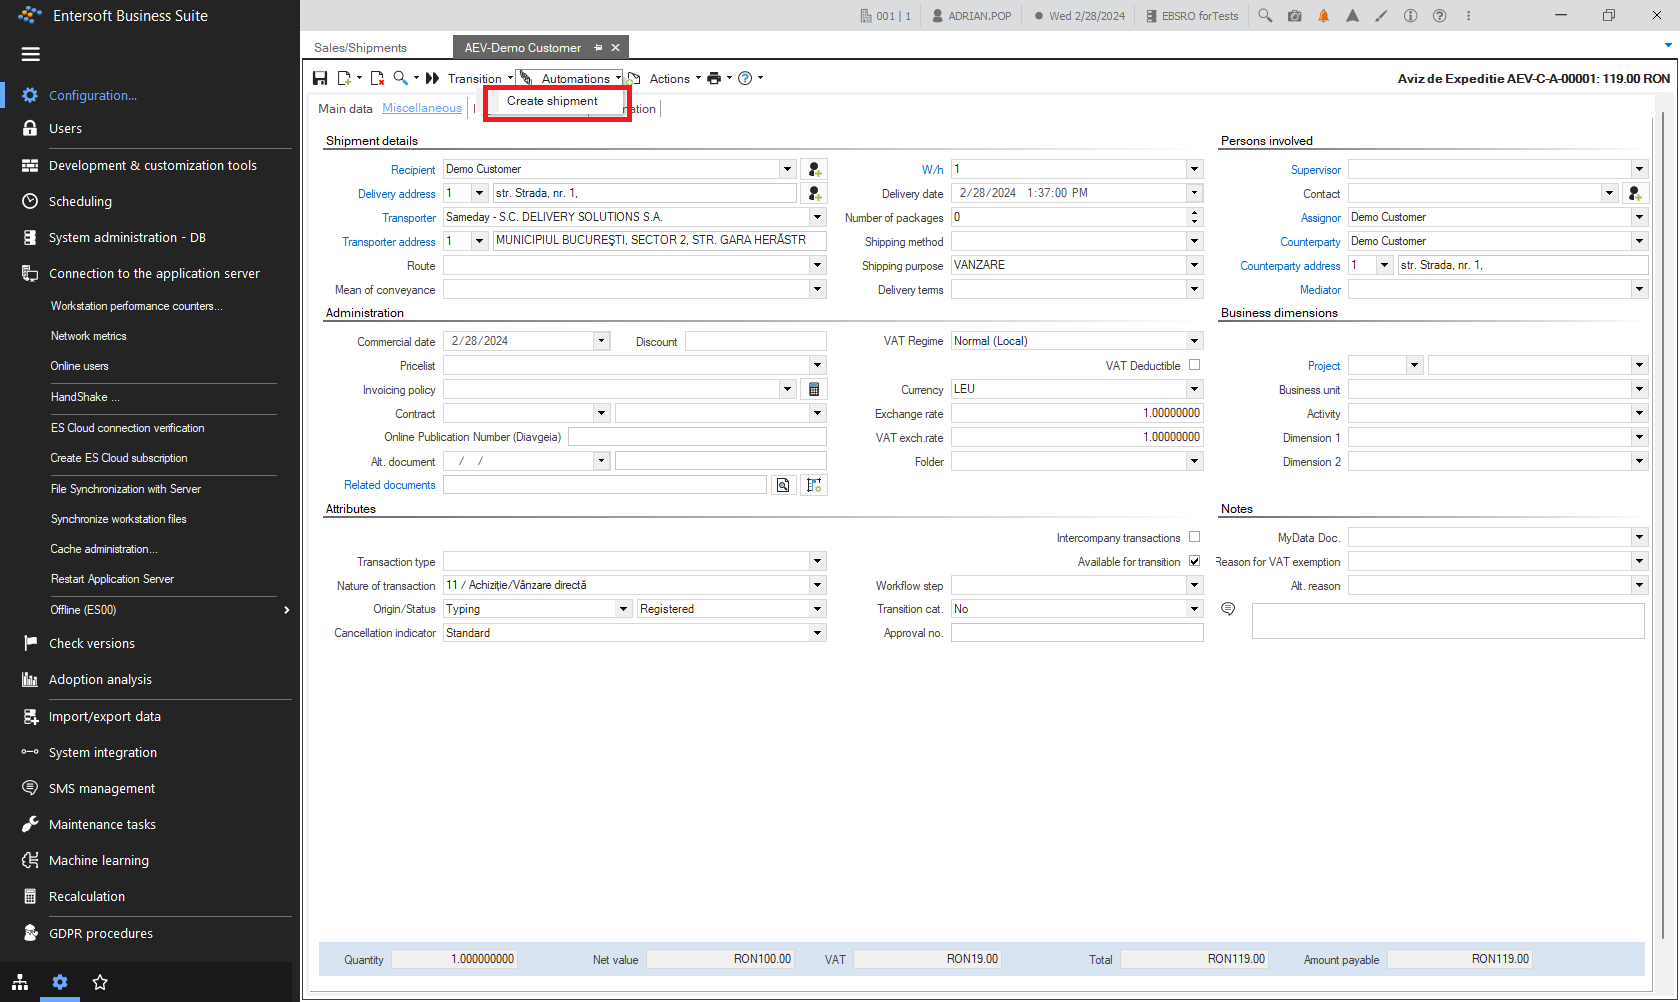
When launching the Create shipment automation You will have to fill in some parameters regarding the specifics of it.
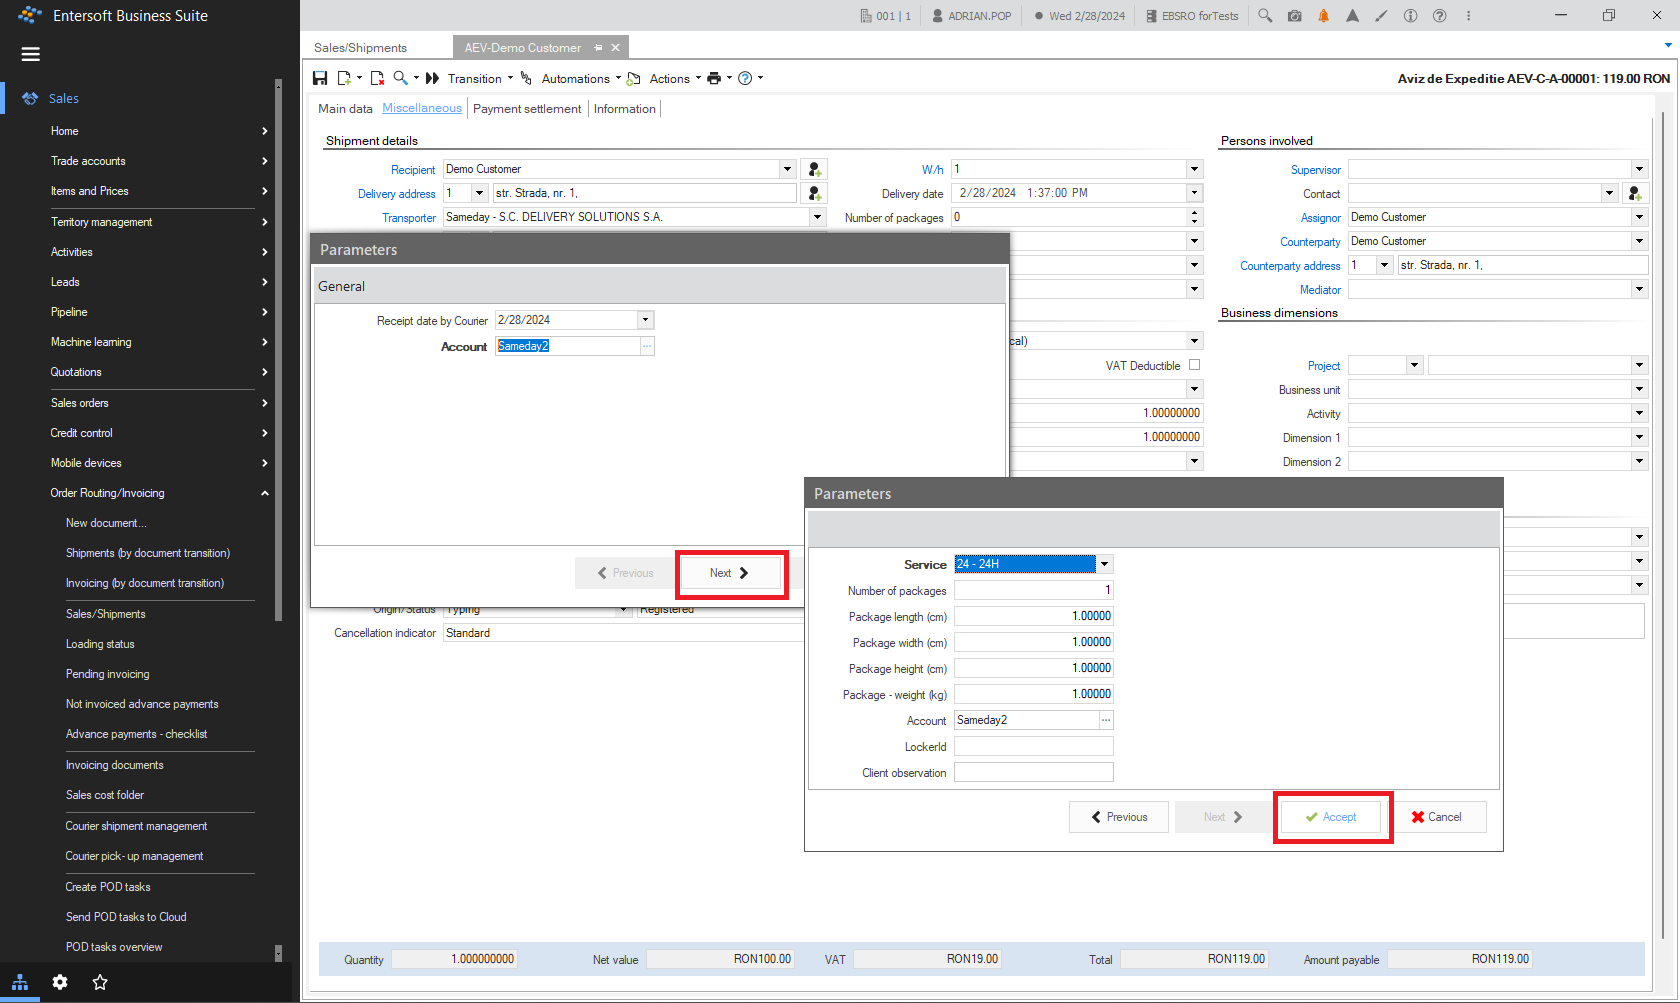
After Accepting, the shipment is actually created, by calling the courier’s API for that specific account used to create the shipment order (AWB).
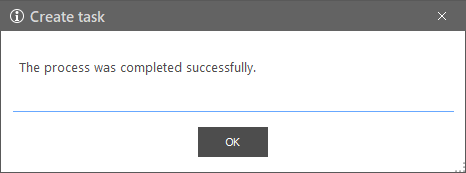
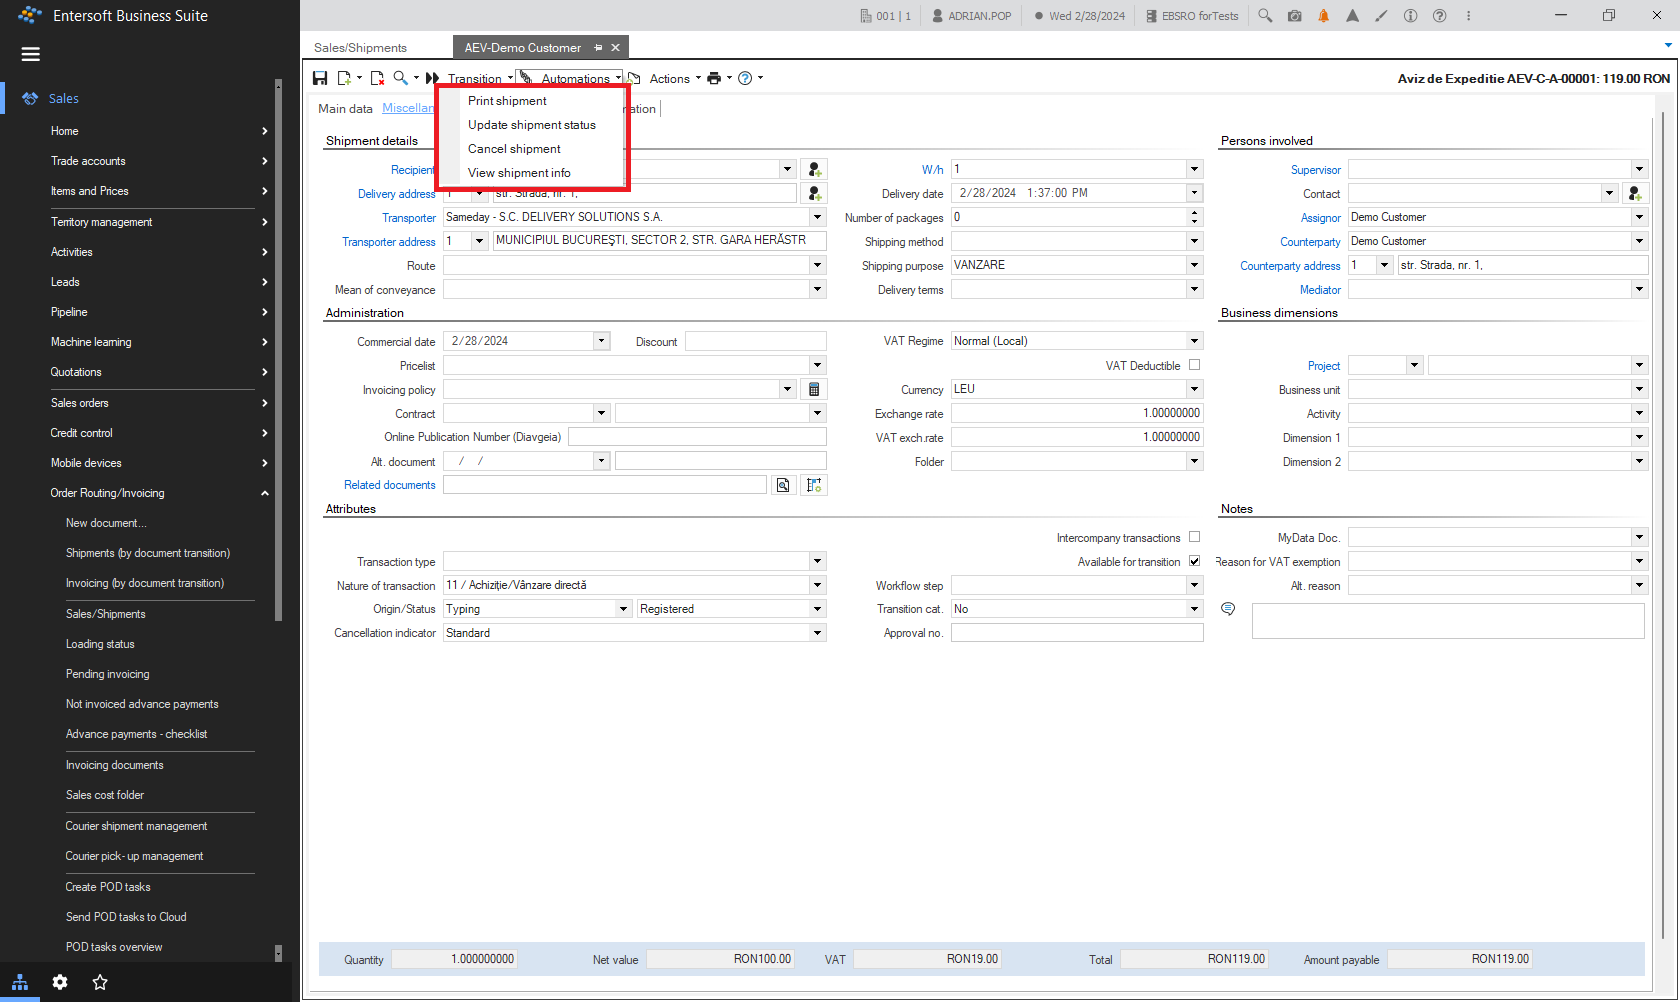
After this was successfully created, there are several automations available for the created shipment:
Print shipment
Update shipment status
Cancel shipment
View shipment Info.
The first of them is used to print the shipment label for the package.
3.2 Print shipment
After selecting the print device it will generate the shipment label for the package.
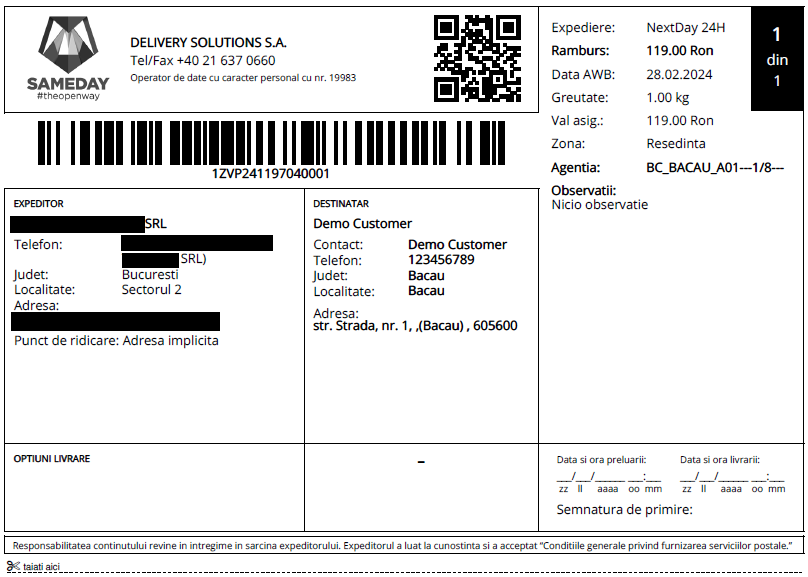
If there are errors, a popup will display the error.
If there are errors regarding the API call on creating the shipping order, the API response is in the latest xml file in the \ESNoSync\SamedayClient folder.
3.3 Update shipment status
This automation is not allowed for newly created shipments. Relates to already finalized shipments.
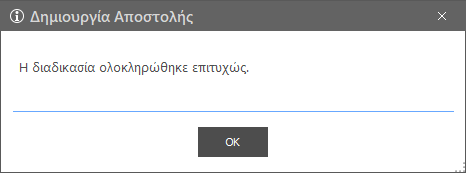
Δημιουργία Αποστολής -> Create shipment
Η διαδικασία ολοκληρώθηκε επιτυχώς. -> The process completed successfully.
3.4 Cancel shipment
This automation deletes the associated shipment to the document.
3.5 View shipment Info
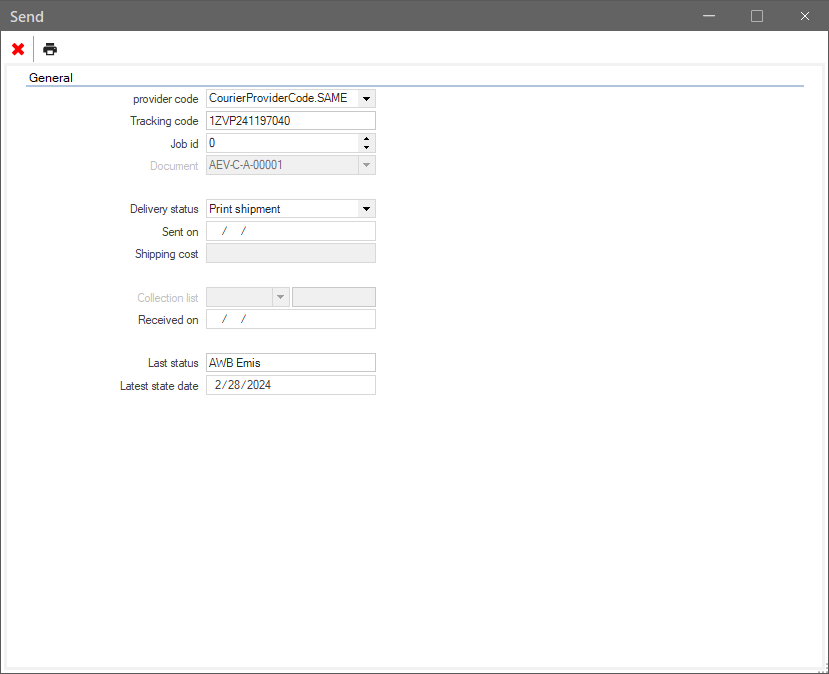
This automation presents the associated shipment information related to the document.
4. Shipments management
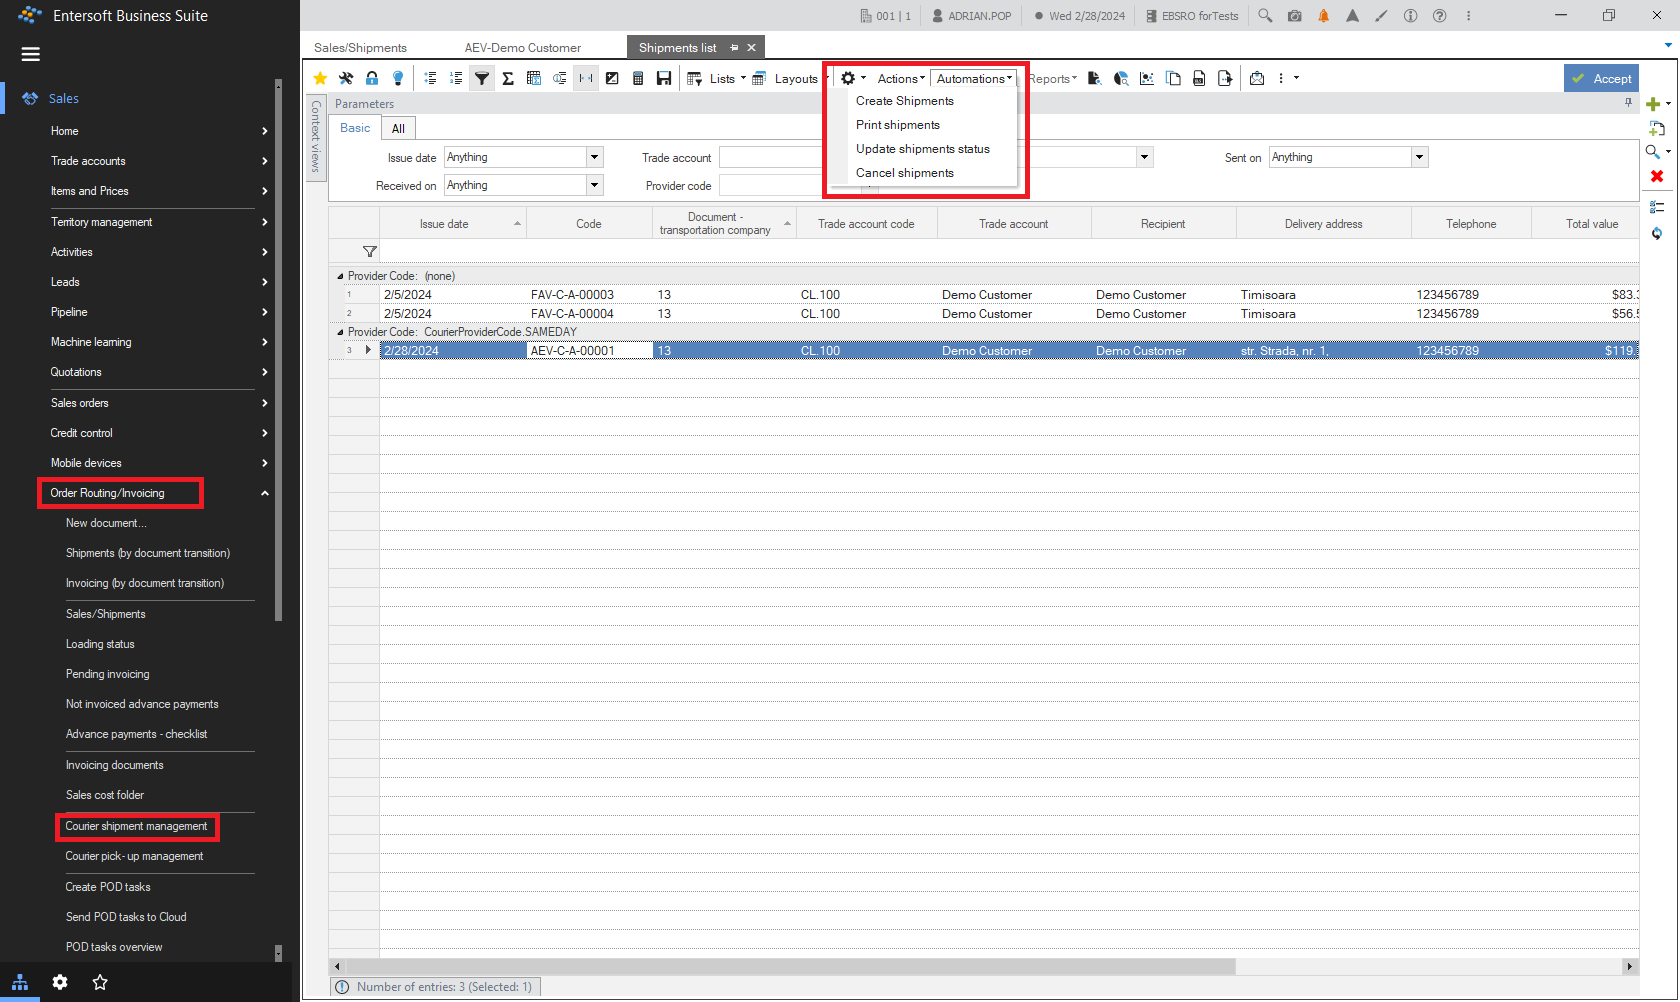
Shipments can be managed via two scrollers under the menu
Sales > Order Routing/Invoicing:
Courier shipment management - is a scroller that presents all the shipments via courier.
Courier pick-up management - this is a scroller for managing the pick-ups.
In this scrollers for the selected lines (documents with shipments) we can apply the shipments’ automatizations:
Create shipments
Print shipments,
Update shipments status,
Clear shipments.
5. Field mapping
A complete shipment field mapping is presented in the following file,
EBS-RO Courier’s Integration - Field Mapping for Create Shipment automation,
for all the couriers integrated in the EBS-RO - Geniki, TNT, GLS, UPS and Sameday - each on a separate sheet.